Kids Circle Chair
It's amazing what projects you can do with 1 board. Sometimes it surprises me when a project will only take one board. Today I'm participating in a one board challenge, the size of board doesn't matter, but can only use one. My little girl loves to color and craft. I've been meaning to make her a desk and chair set. I came across this super cute Double Dot Chair by Land of Nod, and thought it was perfect. However I can't pay full price, because I know she'll color on it and that will be very discouraging! The great thing is that you can build one kids chair with one 1″ x 8″ x 8′ board (about $10). I changed up the base a little bit to make it easier to build and assemble. The kids chair turned out adorable, now I better get on that desk!
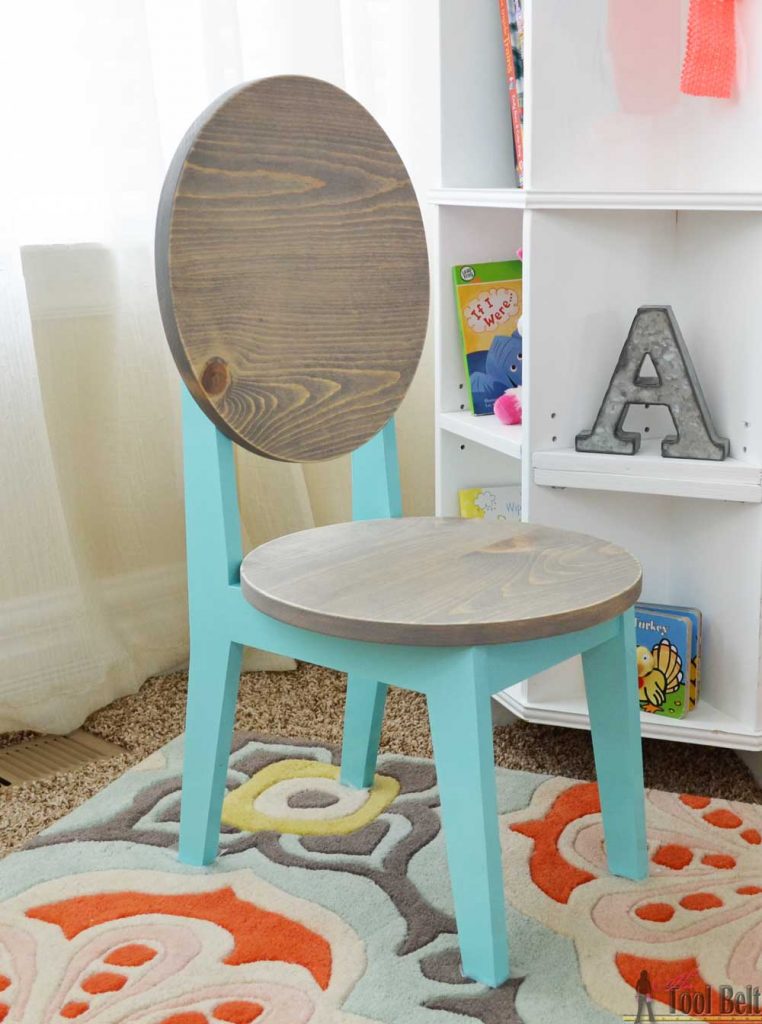
How to Build a Circle Back Kids Chair
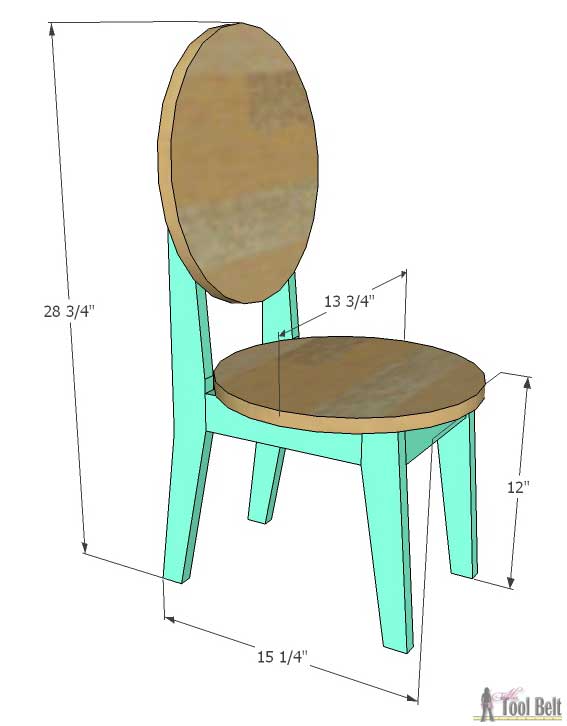 Materials
- 1 – 1″ x 8″ x 8′ board (actual dimensions 3/4″ x 7 1/4″)
- 25 – 1 1/4″ pocket hole screws
- 2 – 1 5/8″ screws or the size you need
- wood glue
- sandpaper
- wood filler
- paint/primer (Rustoleum Gloss /Zinsser primer)
- stain (Gray)
- Approximate lumber cost: $10
When you are buying a board, try and pick as straight as possible for this project.
Step 1
Download and print the patterns for the kids chair legs: child circle chair leg template and circles: child chair circle template. Make sure your printer settings are 100% and not 'fit to page'. Tape together the patterns, gray lines are to assist with line up, and cut out patterns.
Trace 4 half circles onto board, 2 long legs and 2 short legs. You will also need 2 – 2″ x 8 3/4″ and 2 – 2″ x 8″ pieces from the board.

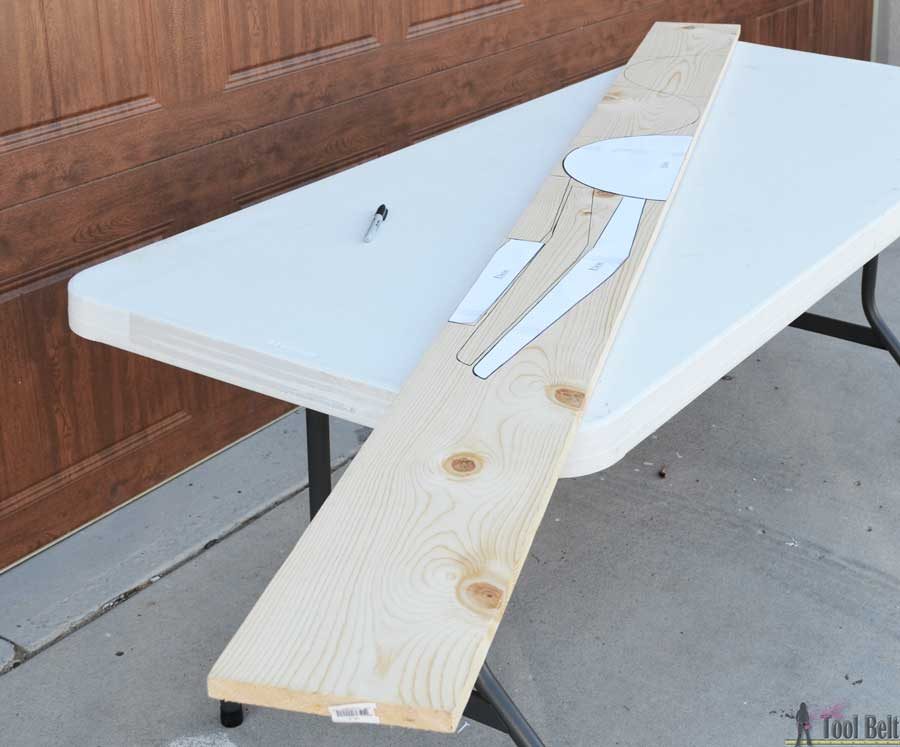
Use a band saw, jig saw or scroll saw to cut out the pieces. I used a band saw, I seem to have better control with a band saw over a jig saw. Sand all of the pieces smooth.
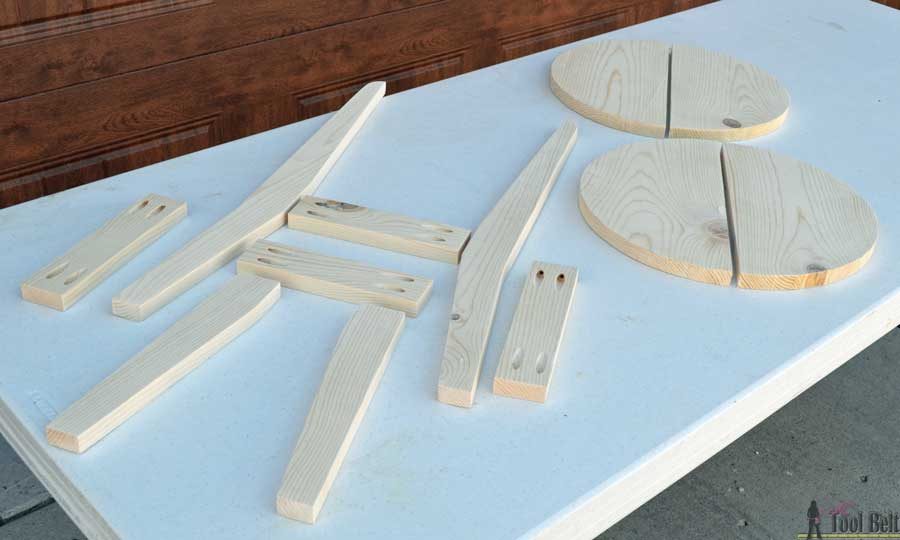
Step 2
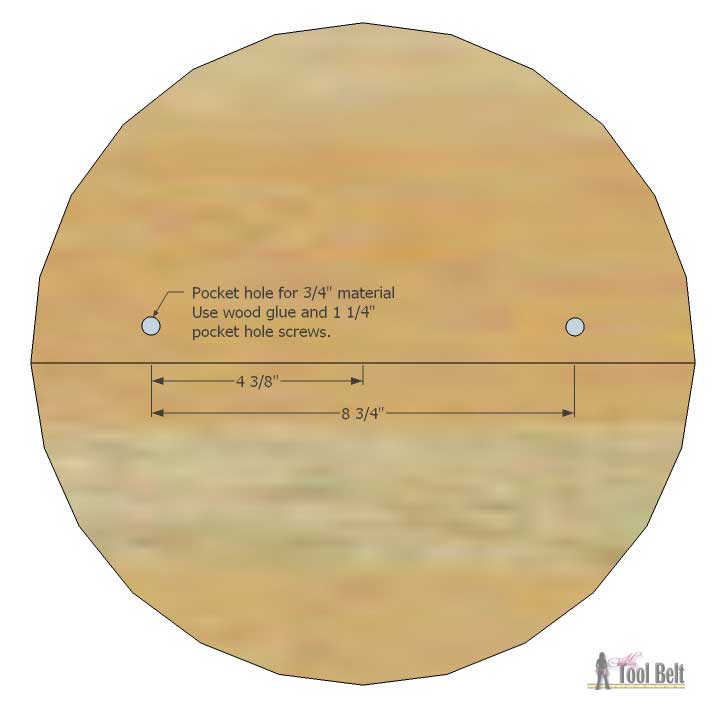
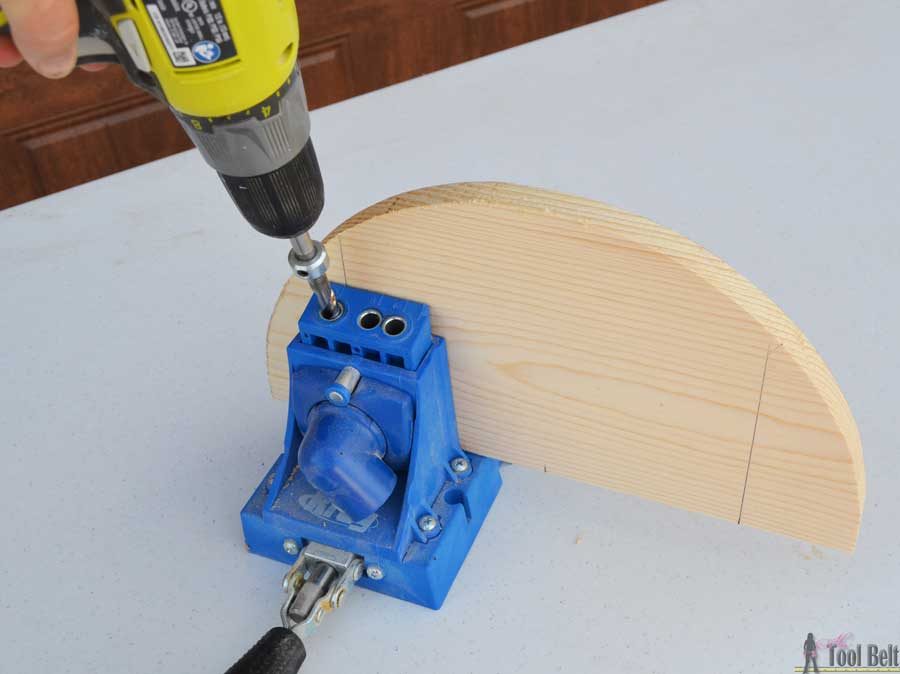
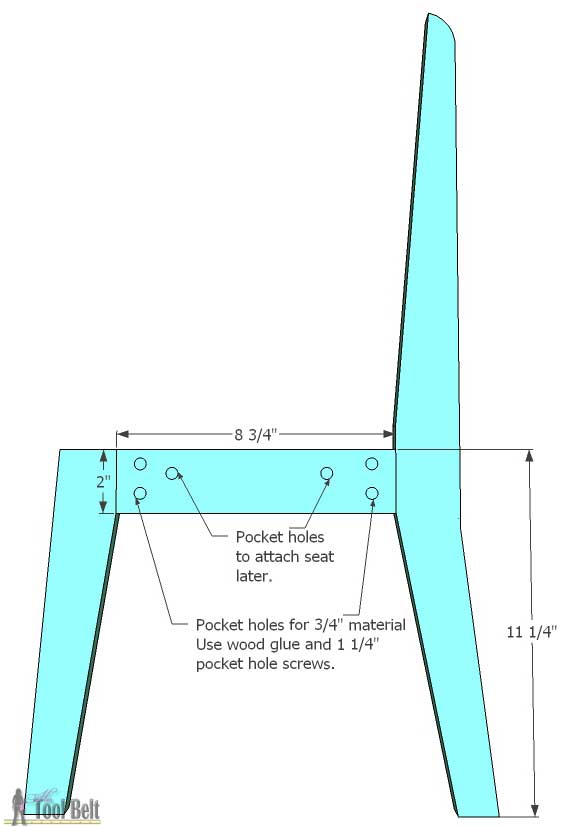
Drill pocket holes for 3/4″ material in each end of the 8″ and 8 3/4″ pieces. Also drill pocket holes in the 8 3/4″ pieces to attach the seat later. (I forgot to do this step at first, whoops!) Drill pocket holes in 2 of the half circles. I did 3 pocket holes in the seat half circle, since they won't show. For the back half circle, if you strategically place the pocket holes 8 3/4″ apart, they won't be seen after assembly. Use wood glue and 1 1/4″ pocket holes to assemble the two circles.
Step 3
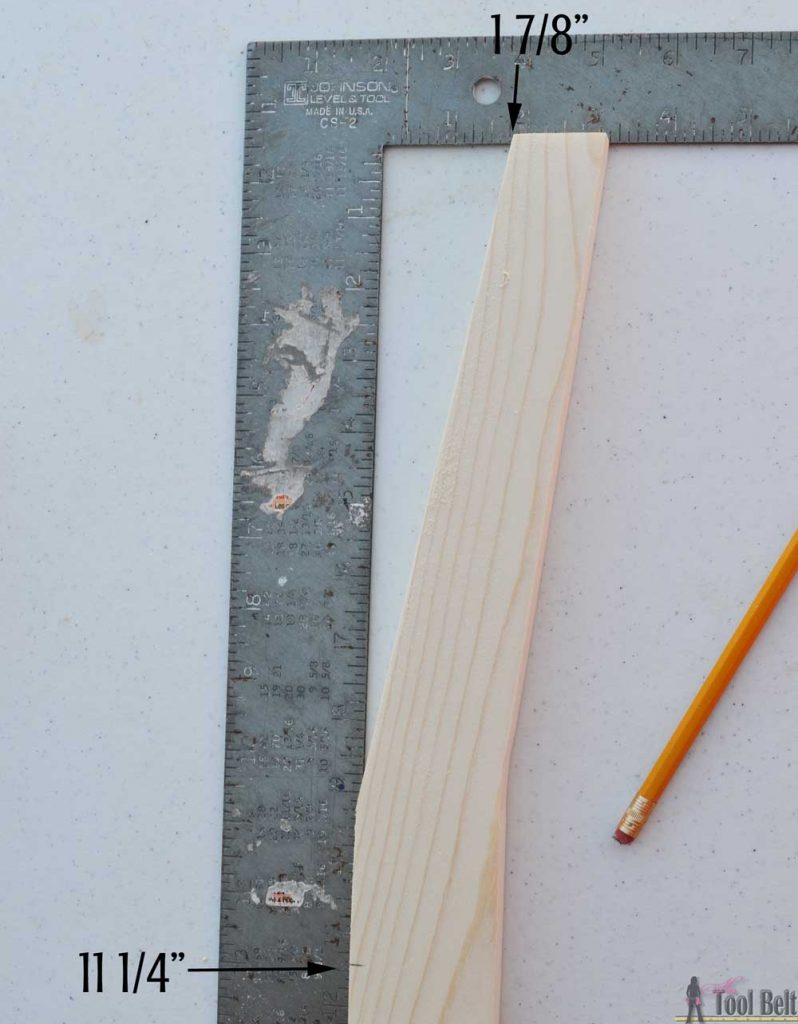
On the long legs, measure and mark up 11 1/4″ from the foot. This is important to make the chair feet sit flat and not rock.
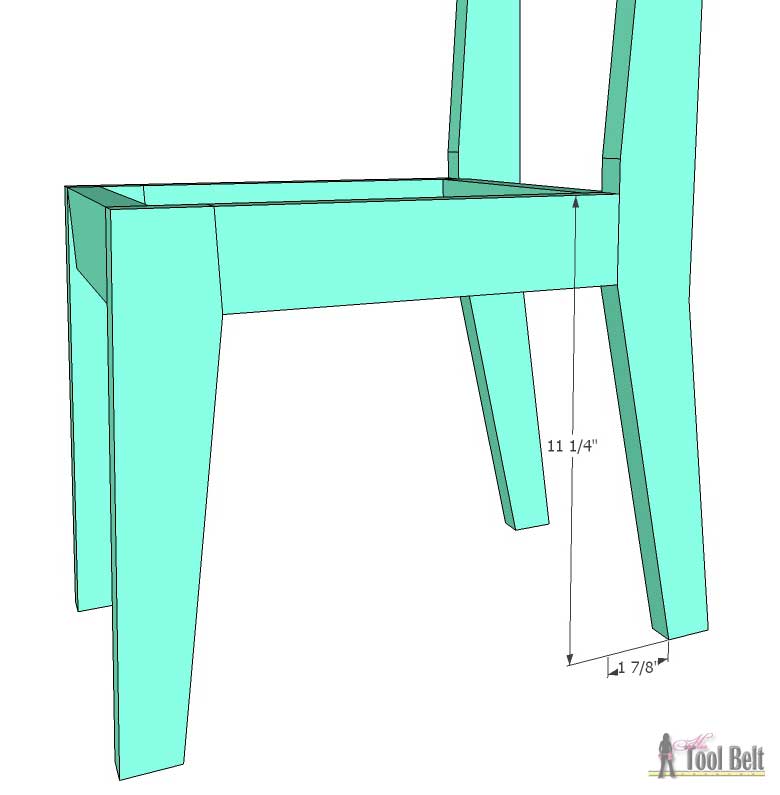
Assemble the chair halves, make sure the pocket holes will all be on the inside, unless you want the holes showing 🙂 . Use wood glue and 1 1/4″ pocket hole screws to attach the 8 3/4″ piece to the long leg, the top of the 8 3/4″ at the 11 1/4″ mark. Attach the other end of the 8 3/4″ piece to a short leg, keeping the tops flush. Repeat for the other chair half.
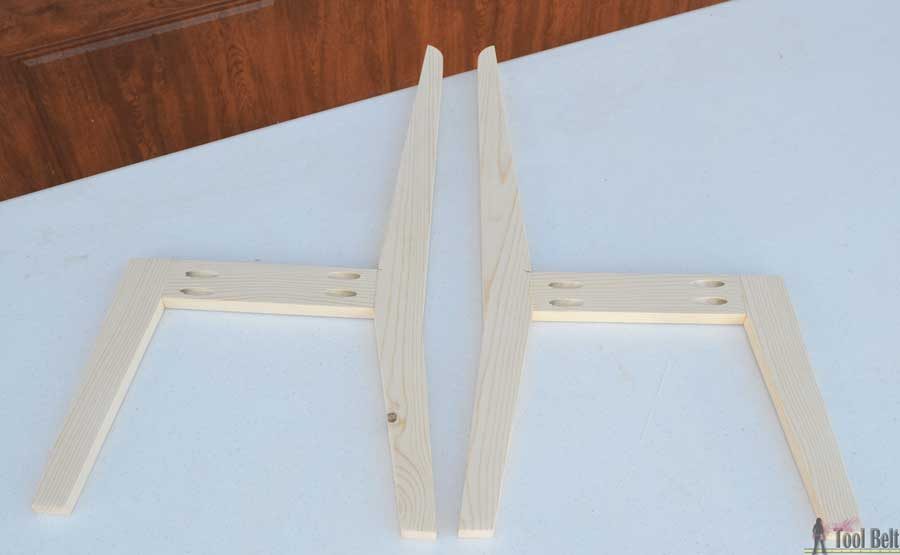
Attach the 8″ pieces between the chair halves with wood glue and 1 1/4″ pocket hole screws. I found it easiest to turn the chair over and place the seat portion on a flat surface to assemble.
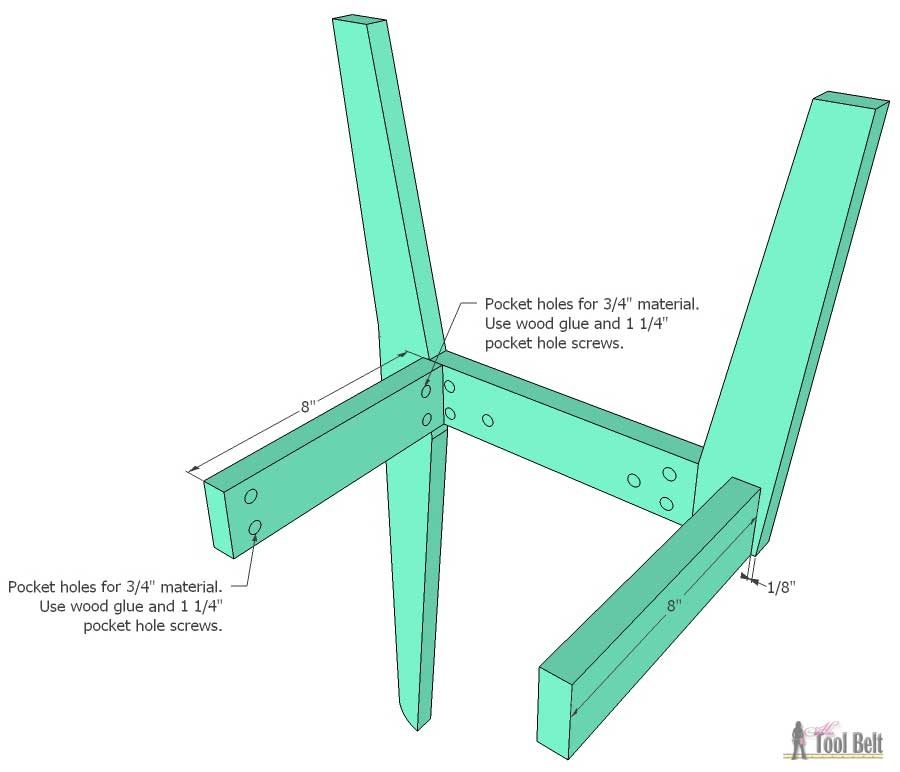
Then attach the other chair half to the 8″ pieces.
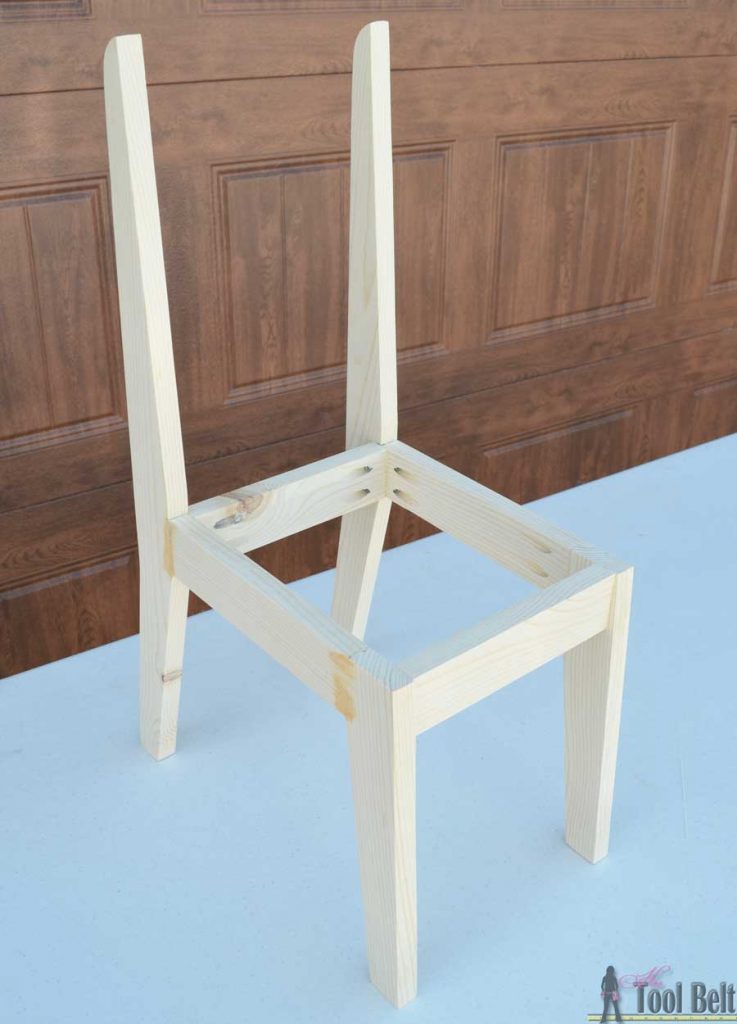
Step 4
Fill any cracks or blemishes with wood filler and allow to dry. Sand the chair frame and circles smooth. I primed the kids chair frame with paint primer and allowed to dry. Then I painted the chair frame with Rustoleum Gloss Light Turquoise spray paint. The seat and back circles were stained with Gray.
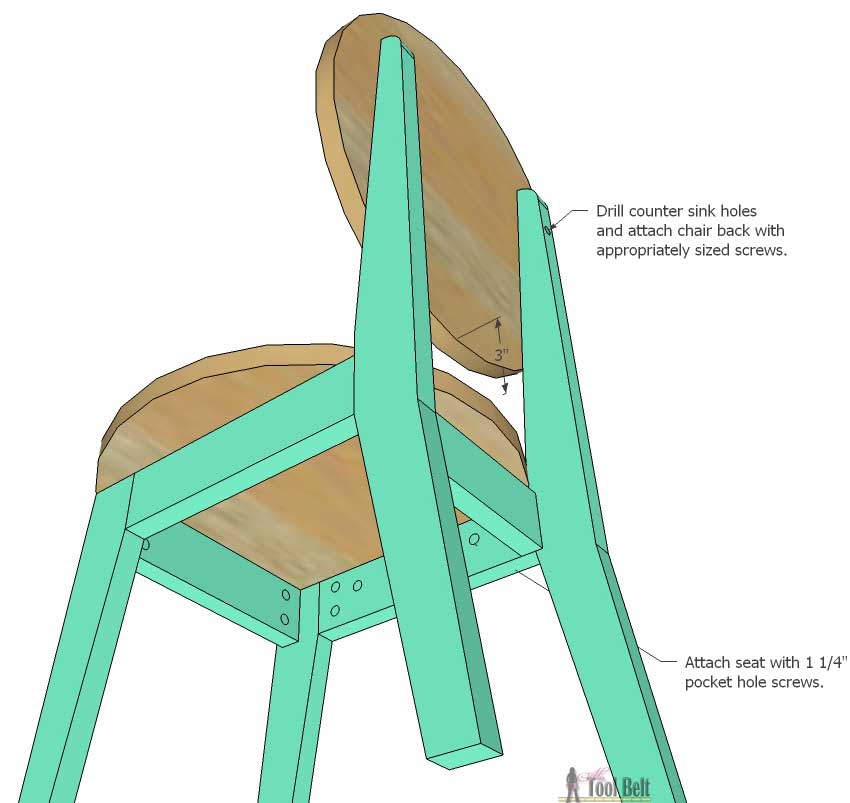
Once everything is dry, attach the seat to the frame with 1 1/4″ pocket hole screws. Place the back circle about 3″ up from the seat. Drill counter sink holes on the chair frame back to attach the back circle. I used 1 5/8″ screws to attach the back to the frame, the screw length depends on where you drill the counter-sink holes. The pocket holes in the back circle should be covered by the chair frame.
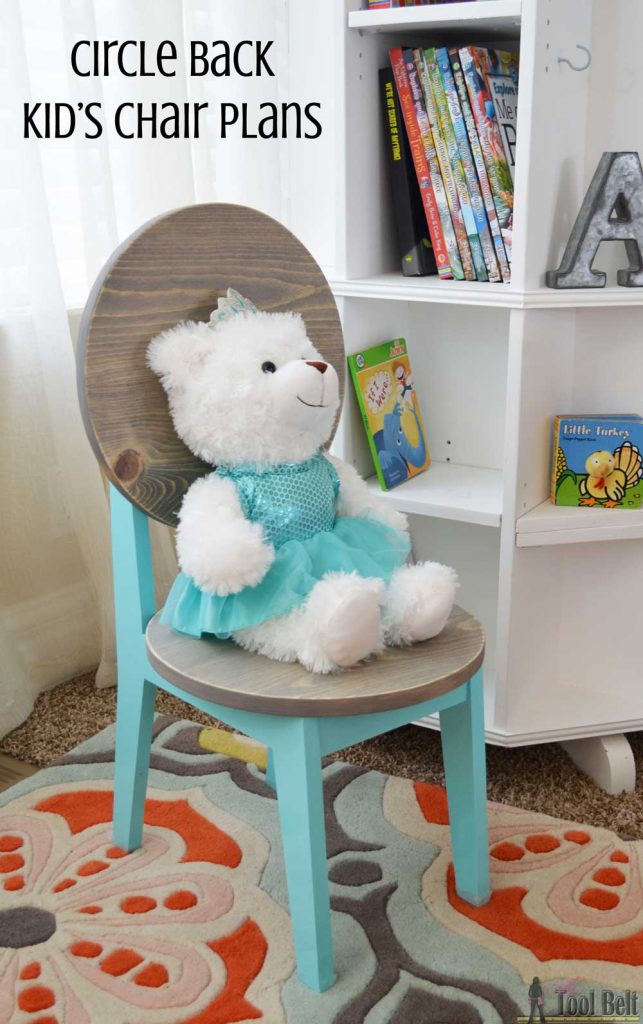
This is a cute little chair for my 3 year old daughter, or for princess bear to read a story!
Check other cool projects to make with 1 board!
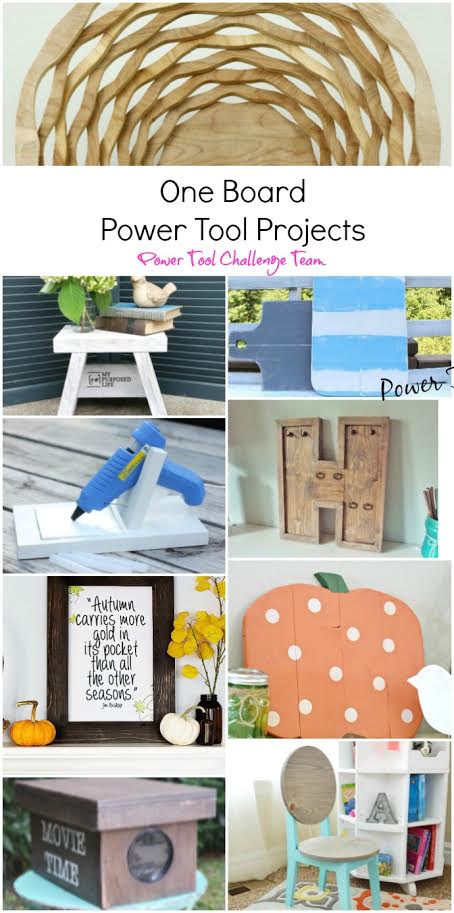
- Scroll Saw Wooden Basket by Kim Six Fix
- Small Step Stool by My Repurposed Life
- DIY Pizza Bread Board by Refresh Restyle
- DIY Glue Gun Holder by Virginia Sweet Pea
- DIY Wood Letter Jewelry Hanger by Designs By Studio C
- Easy DIY Picture Frames by Domestically Speaking
- Easy Wood Pumpkin Cutout by H2OBungalow
- DIY Wooden Movie Projector by Thrift Diving
- Circle Back Kids Chair Plans by Her Tool Belt – You're here 🙂
Linked to link parties, savvy southern style, remodelaholic
Source: https://www.hertoolbelt.com/circle-back-kids-chair-plans/


0 Komentar